Thursday Tip with Hali - Hand Sewing
Thursday Tip // Hand sewing
When you think of sewing, do you picture a sewing machine or a needle and thread?
As garment sewists we often try to avoid hand sewing at all costs because it feels like more work or is slower in comparison to our fast machines. I’m not here to tell you that one is better than the other; they each have their uses for a reason. However, I have found that learning a few hand sewing techniques can really up your sewing game and give you confidence that your hand stitched seams will hold. This is by no means a comprehensive guide to hand sewing but I think it is a good starting point if you haven’t really thought about incorporating hand sewing into your garment sewing practice.
First, let’s talk about needles.
Hand sewing needles are categorized by type and size. The type of needle is determined by the kind of sewing you are doing (eg. Applique, quilting, mending) and the size is determined by the type of fabric and thread you are using. The larger the number for needle size, the shorter and finer the needle will be. For example, a size 8 needle will be much shorter and thinner than a size 3 needle. Also when you are choosing a needle size try to remember, the finer the fabric, the finer the needle should be.
Since we focus mainly on garment sewing here, these are some common needle types you could consider having on hand for those times when the sewing machine just doesn’t cut it.
Sharps (or applique) needles are a good general purpose needle for hand sewing or mending. They have a sharp point and a short round eye. Sharps come in needle sizes from 1-12.
Size 1- 4 - med to heavy fabrics
Size 5-10 - light to med fabrics
Size 11-12 - very light to light fabrics
Milliner (or straws) needles are similar to sharps but they are longer and finer with a tiny eye. A size 8 or 9 is a fairly common size that would work well for most light to medium weight fabrics.
Ball point needles are used for knits, for the same reason you use a ball point needle in your sewing machine. The dull point separates the threads in the knit fabric instead of piercing them which would cause tearing or runs in the fabric.
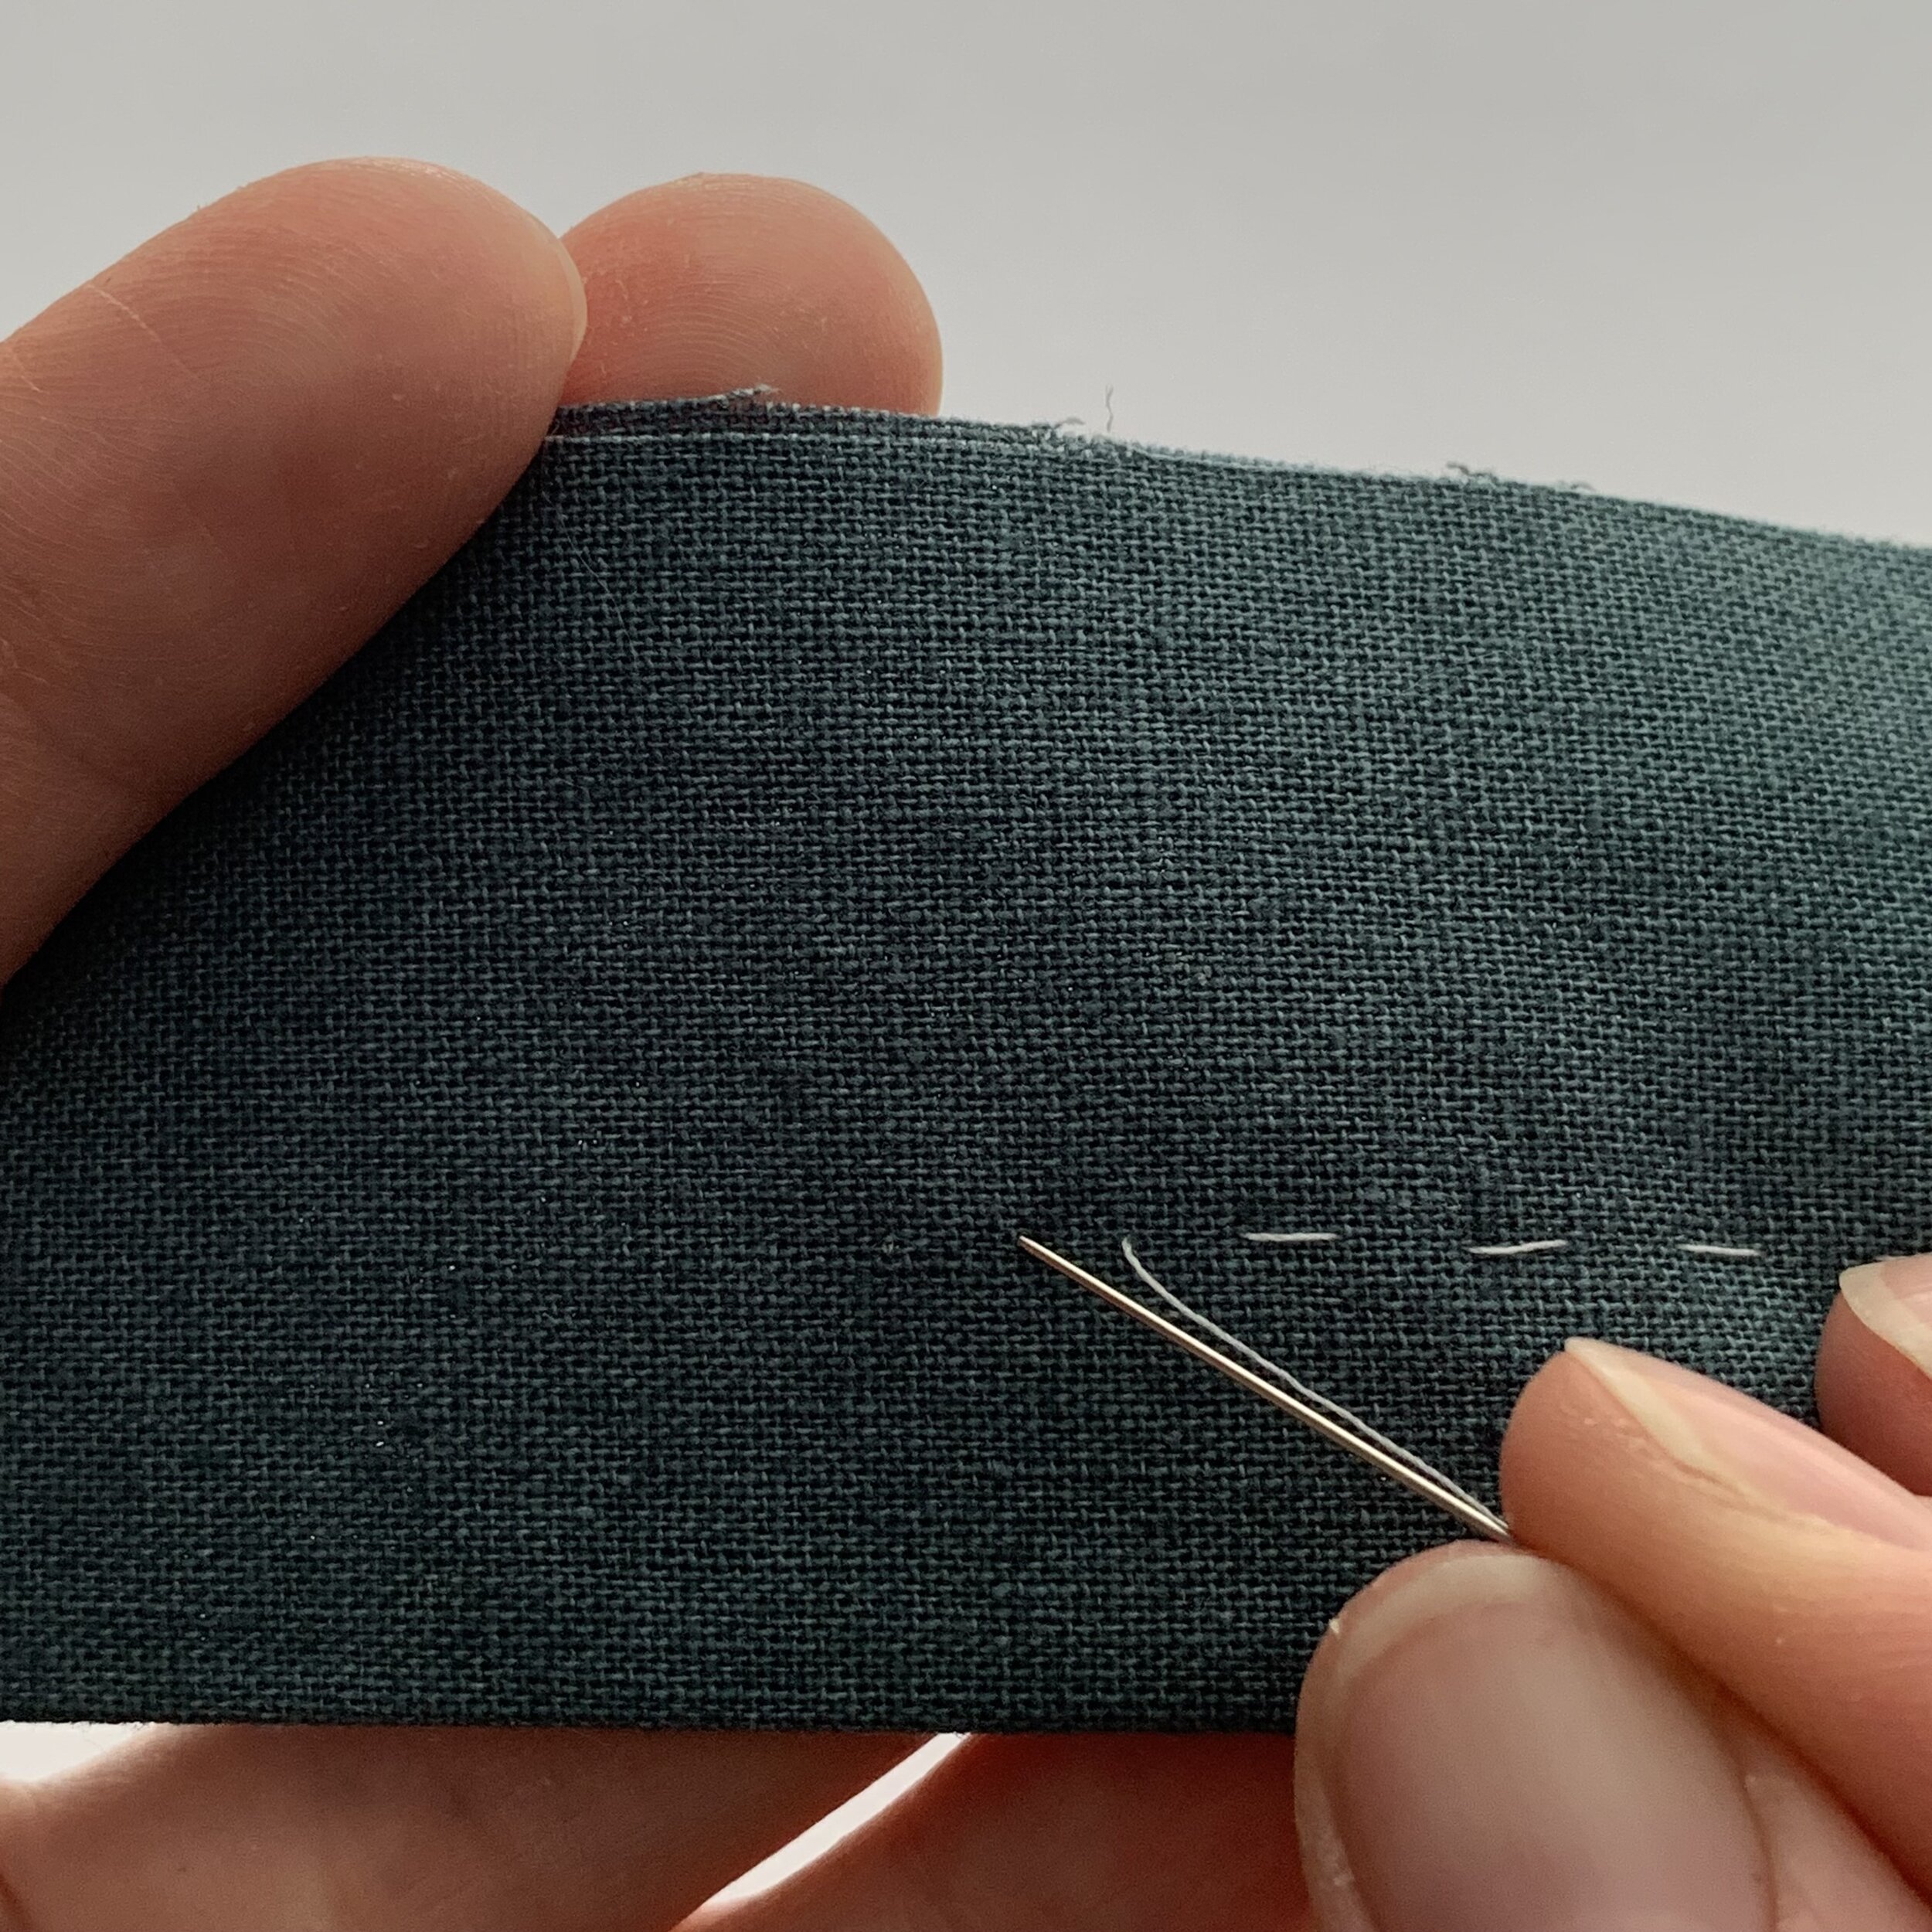
For most hand stitching you can use your preferred method of a single thread or double thread through your needle. I have illustrated one anchoring and/or tying off method but a simple knot hidden on the wrong side or buried in between the layers of fabric works just as well. Below are some examples of some hand sewing stitches that could be used for a variety of applications in garment sewing.
Notes: These instructions are written with right-hand dominant instructions first and left-hand dominant instructions in brackets. Contrasting thread is used for better visibility of the stitches but if you use matching thread (which is typical) then the “invisible” stitches become even more invisible. The choice is yours.
Anchoring/tying off:
Starting where you want to begin stitching, make a small horizontal stitch (¼”). Pull the thread through and then make another stitch just inside or as close as possible to the same holes as the first stitch. Pull the thread through but not all the way, leaving a small loop above the fabric. Put your needle through the loop from the same direction twice. Then while holding the short thread tail secure with one hand, pull the needle thread to tighten the knot against the fabric. The short thread tail can be cut (but not too short) and then with your needle, wiggle the fabric so the thread tail pops underneath to be hidden in the layers of fabric.


Running stitch - This stitch is worked right to left (Left-handed: work left to right) by making evenly spaced stitches about ¼” apart. You can put your needle in the top and back through repeatedly or put several stitches on your needle at one time and then pull the thread tight (but not too tight that it gathers, unless that is your intent). A running stitch can be used to quickly put a seam together or finish a seam in a hard to reach place. It can be used for gathers or easing in a sleeve. These stitches are usually permanent but the farther set apart, the easier they are to identify and pull out if needed.


Basting stitch - This stitch is worked right to left (LH - work left to right) in the same way as the running stitch with longer stitches spaced farther apart; closer to ½”. These longer stitches can be used to baste pieces of fabric together to check fit or temporarily hold together before sewing a seam. They are usually temporary stitches and will be taken out at some point.


Herringbone (or stretch stitch) - This stitch is worked left to right (LH: work right to left) and is a series of very small stitches with threads overlapping to create a secure stitch with some stretch which makes it great for knits as well. This stitch hardly shows on the right side for an almost invisible hem. Starting on the left (LH: right) and with needle pointing left (LH: right), insert your needle just above the folded hem and make a very small horizontal stitch (just a couple threads as these stitches will show on the right side of the fabric). Make another identical stitch in the top of the fold of the hem (NOT through all layers of fabric) about a ¼”-⅜” away from the first stitch. These stitches will form little X’s which gives this stitch its stretch and strength. Continue until the end of the seam and secure using your preferred method.


Catch stitch - This stitch is similar to herringbone but without the X’s part. It is also not very noticeable on the right side of the hem. This stitch is worked right to left (LH: work left to right). It is a series of small horizontal stitches above the folded hem and into the top of the folded hem. This stitch is slightly faster to complete than the herringbone stitch because you don’t have to work around the crossed threads. This stitch is sometimes called a “ladder” stitch as well because the threads that connect the layers of fabric when pulled apart look like the rungs of a ladder. It can also be used to close a seam with two folded edges as in a pillowcase or the opening left after inserting elastic into a waistband.


Blind stitch (or Slip stitch) - This stitch is worked right to left (LH: work left to right) and looks good from both sides of the garment. It can be used for an invisible hem or facing, or connecting a folded edge to a flat surface. You could use this stitch to secure a lining on the inside of a garment when you want the stitches to be invisible. Variations of this stitch can be used on a double folded hem or a single folded hem with a finished edge and using either horizontal or vertical stitches. The method I have shown here uses horizontal stitches above the hem edge. Insert your needle above the hem edge to make a horizontal stitch, catching only a couple threads. Then in the same motion (or two separate motions) insert the needle at a very slight downward angle into the folded hem edge, coming out about ⅜”-½” from the first stitch. Tighten the thread and then insert your needle directly above the folded hem to make another horizontal stitch and continue in this way until the end of your seam.


